Author: Christian

  • Vaulted Roof Underway

    Now that the rear of the extension is up to the wallplate height, I have started to frame the vaulted roof using 47×175 graded timber that I bought from A10 Timber

    My reasoning behind this early start on the roof is to get a dry area to store some materials. In hindsight I would build the wall up at the gable end first in future.

    There are two large rooflights to go into this roof to allow light into the interior of the ground floor, these are framed with double joists either side and double trimmers between, all bolted together with coach bolts and timber connectors.

  • First Lintels In

    So I’m up to the lintel height at the back of the building now and I have fitted the first two lintels. One over the patio doors and one over the kitchen window.

    They’re not as easy to fit as I thought, keeping the blocks level on the lintel is actually pretty tricky as they seem to have a tendency to tilt outwards, I took it slow and steady and used support to hold the blocks plumb.

    I know I wanted the building to be solid but I’m not sure if I made the right block choice with these 7n dense concrete ones, they are a killer to lift and lay!

  • Tree Butchery Courtesy of my Neighbour.

    So, it’s no secret that my neighbour has not taken the fact we’re having an extension very well. After giving me some planning advice to suit himself which I rejected as it would not work for us.

    He’s turned from being an alright bloke that I used to get on with, into a bit of a tosser.

    I wont go into the issues here save one.

    I went away for the weekend for my good mate Dan Bunce’s stag do in Brighton, and Carley went off to her mum’s for the duration with Daisy.

    For one reason or another Ashley and I came home early on the Saturday afternoon, and whilst we were travelling up the M23 I get a text from my belligerent neighbour telling me he’s knocked my ladders over (they were resting against my fence) whilst carrying through some “clippings”.

    I wasn’t sure what clipping he’d been doing as he doesn’t actually have any trees in his garden but I left it at that for now to see for myself when I get home.

    We get back to mine and after a cuppa I decide to go out and sort the fallen ladders out and make sure they haven’t smashed anything on the way down, which luckily enough they hadn’t.

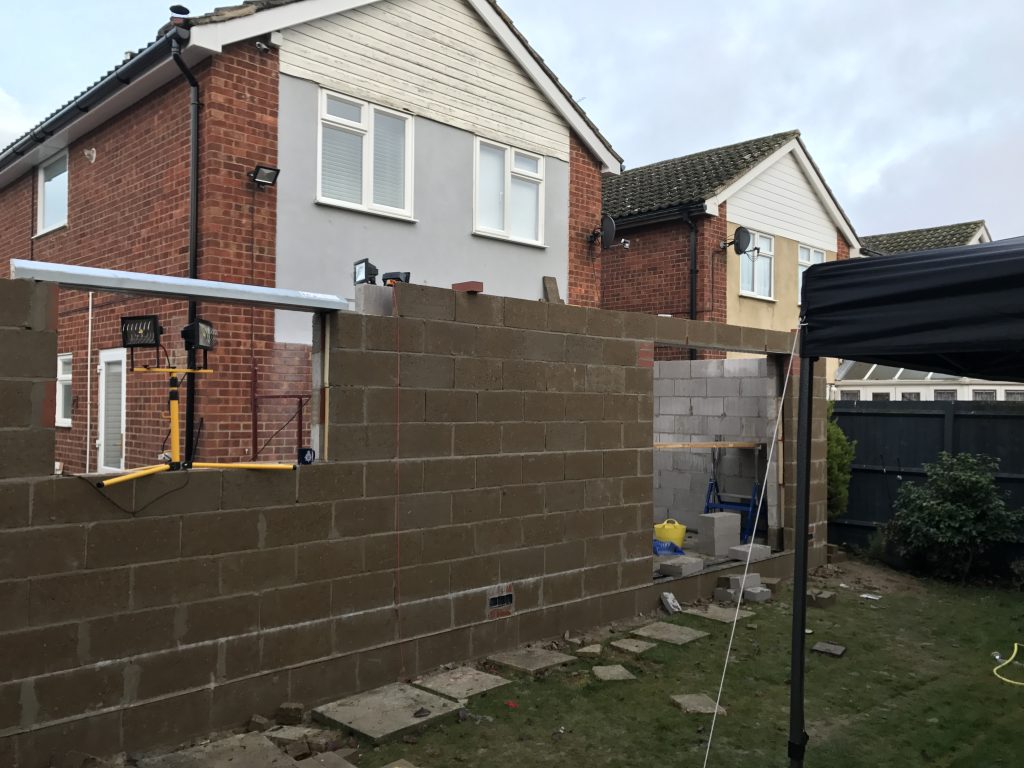
    When I tun around to go back into my house, I notice THIS:

    I mean come on, really?! What a hatchet job.

    Obviously the chainsaw mad gardener next door thought that this was the best course of action to take, perhaps in protest of my extension?! Who knows.

    Now bear in mind my neighbour is a landscape gardener by trade, I would have thought that he might have done a better job than this.

    After the initial shock had subsided, upon reflection, I don’t actually give a shit about this. The tree will still look just as nice from my side, it’s his view that is going to look bloody awful. Why?! 

  • Walls taking shape

    Walls taking shape

    Now that the slab is done, I have started to make some progress in getting the block work done. It’s not as quick as an experienced builder would be doing it, but I am saving a hell of a lot of money by doing this in my spare time.

    I’ve been using a bricky to get my mortar level and so far it has been a godsend. It allows the joints to be nice and even. The only issue is that it becomes really difficult to take out any unevenness between the blocks with a thin bed.

    Another issue I have noticed is that the bricky is tight against the insulation and this makes it difficult to move.

  • The Slab

    So with the hardcore and sand down and consolidated, in goes the 1000 gauge DPM sheet which is incredibly thick and the 100mm of insulation board with any gaps filled with sticky expanding foam to complete our floor insulation.

    I’ve laid some 3×2 timber onto the insulation for two reasons, one to give me a rough depth for pouring the slab, the other to provide a channel for the services into the new build.

    I arranged for the concrete to be delivered with a pump so it wouldn’t break my back with the wheelbarrow and save a hell of a lot of time.

    Here is the freshly poured and floated concrete slab that Tim (Carley’s Dad) very kindly helped me rake and move around into position. The concrete guys were out the front having a smoke whilst the concrete was just blasting out everywhere so we had to work pretty fast to stop the place being overwhelmed.

    I used a big blue float to get it smoothed off, it was the first time I had ever used one. Took some getting used to. Not sure how level it’s going to be as I have never poured and smoothed a slab before.

    Couple of days later and the slab has hardened off and I have started to build the inner leaf up a bit.

  • Hardcore and Type 1 time

    Now there is a retaining wall to work with, the Type 1 and the Sand for blinding have arrived.

    I managed to enlist the help of my brother and brother-in-law in order to shovel and barrow the aggregate through to the back, as I knew it would have killed me alone.

    I think the guy that tipped the Type 1 actually delivered ten tons rather than three like I needed, the heap was about eight foot high, and even after we’d barrowed it all around there was still a Ben Nevis on my driveway. Not really sure where we’re going to put all of that, I’m going to have to have a think about it!

    100mm of Type one is down, raked and wackered comprehensively, followed by 50mm of sand.

    Ashley did a very good job of overseeing the whole affair and occasionally pushing the rake about, so thanks for that Bro!

    Craig and I decided to push on, and we got the DPM sheet laid out over the site and thoroughly overlapped and tape jointed, than got nearly all the 100mm insulation boards in. It was pretty dark and cold by the time we’d finished.

    I didn’t realise at first that I would need to extend the existing airbricks to outside the new extension, so I had to buy airbrick adaptors, some more soil pipe, and new airbricks and ducting which also had to be run in between the insulation sheets before being concreted over. I hope nothing starts to float when I get the slab poured

  • Outline of the building is starting to take shape

    Outline of the building is starting to take shape

    So we have started to lay the blocks around the perimeter of the building, and anticipate building up two courses all the way around in order to retain the concrete slab floor.

    Had a bit of a nightmare with the blocks as the footings were not exactly level and I had to cut some blocks down to make up a level course, and these 7N dense concrete blocks are very, very heavy. That makes cutting them a bit of a nightmare and means the mortar has to be quite stiff otherwise the block just pushes the mortar out from under the block due to their extreme weight.

    Walls starting to take shape

    Once I’ve got the two courses up, it will be hardcore and sand next. That’s going to mean a hell of a lot of shovelling and wheelbarrow action, which I’m really not looking forward to.

  • New Drains Are In

    New Drains Are In

    So, after waiting forever for my underground soil fittings to arrive after they were missed off the first delivery, I ended up cancelling the order from Plastics Express and buying all my soil fittings from Screwfix as I just couldn’t wait any longer. It had been over a ten days since the order was placed and the delivery was supposed to come next day. I won’t be shopping there again.

    The manhole walls were knocked in and the channel removed ready to be piped through:

    Old manhole removed ready for piping through

    The original builders of my house must have poured about a yard of concrete every metre of soil pipe as it took me two hours of breaking to expose enough clay pipe to actually fit the coupler to accept the uPVC pipe. This is tiring and tedious work, as I had to exercise extreme caution not to damage the 50+ year old clay pipe yet use enough force to smash away very hard seasoned concrete.

    Here’s the new uPVC underground drainage pipework in place and partially backfilled with pea shingle.

    New underground pipework

    I called up and booked for Building Control to come and have a look and within a very short while I had an inspector from building control around to inspect the works and all is well. I have to say BC have been great so far, if I call them before 10am they come round the same day.

    Backfilling over the pipework has been done and the area is safe to walk over once more with no holes to fall down and even better than that, no stinking leaky pipes to contend with and a drainage system that will be good for many years to come.

    My next job to start on the first course of blockwork around the footings to retain the concrete slab.

  • Preparing for new drains

    Today I had a quick go at breaking out the old bottle gully in order to change it into a soil drain pipe to eventually accommodate the new kitchen and ensuite.

    Broke out the concrete above the pipe only to find that the clay pipe was broken in several places and the joint between the uPVC trap and the clay soil pipe consisted of a uPVC coupler simply pushed over the clay pipe.

    This never would have sealed effectively and has probably been leaking since day one. As it was the pipe has been leaking badly so the ground was saturated wet and the smell coming up from in the ground was horrendous.

    Truly awful and indescribable. Years of food waste, washing machine waste and dirty dish water all combined into the soil around the pipe makes for a nauseous experience.

    It absolutely stinks.

    img_0168

    My temporary drain pipe from the kitchen into the soil until my new drainage pipes appear, hopefully Monday.

    Here’s the pile of stinking soil that I had to excavate by hand.

    img_0173

    All my underground drainage pipe work should have turned up today, however the delivery was incomplete. They only brought the lengths of pipe and my DPM sheet. All the fittings are still AWOL from Plastics Express.

    In the end I asked Carley to stop off at Screwfix while she was out in order to get a clay adaptor and a 45 degree bend so I can hook up to the existing pipe. She came back with just the right item, she’s good like that.

    Fitted the clay adaptor to the existing pipe, and added a 45 degree bend, then piped the kitchen waste pipe into it. Still awaiting the rest bend to bring it up to vertical, hopefully it will arrive tomorrow.

    img_0181

    Next big job is the installation of the new drainage pipes and destruction and removal of the manhole to pipe it through, when the rest of my absent fittings arrive. Not the nicest job in the world to come but we’ll get through it.

  • Concrete Footings Poured

    So today the footings were poured, or should I say, pumped.

    The concrete people turned up, set up the pump and just blasted it in

    12 cubic metres of concrete went into the ground in less than an hour, and my shuttering around the shared drain seemed to hold up perfectly. Then again it did have stonking great lumps of sleeper supporting it.

    img_0141 img_0142

    Next is to wait for it to harden enough to remove the shuttering and backfill around the sewer pipe with pea shingle, and then onto the new drainage.

    Of course, I had to christen the foundations of our new extension with all of our names and the date!

    img_0144